Connecting Microsoft Entra ID
MyPass Cloud integrates seamlessly with Microsoft Entra ID (formerly Azure Active Directory). This integration enables secure identity management, password synchronization, and self-service capabilities directly within your cloud-based directory.
Users benefit from self-service features like password resets and account unlocks initiated from the MyPass portal, which are securely applied to Entra ID. This maintains a unified password origin, enhancing security and simplifying management across connected systems.
MyPass can use either password, SMS Pin, Email Pin, or a combination, to enroll an Entra ID-only user (other MFA options may be available for federated users). Even if Entra ID is configured to enforce or demand Entra ID MFA, MyPass can still authenticate using password. However, additional configuration is required to avoid conflicts:
- Conditional Access: If enabled, whitelist the MyPass server IP in the profile. Exclude the location in the policy .
- Account Lockout: If not configured, MyPass advises enabling it .
Locked or blocked (At Risk) users can still reset passwords using MyPass. Locked users are unlocked automatically by Entra ID based on lockout settings. Blocked accounts may have risky sign-ins dismissed, depending on Entra ID settings.
Quick Implementation Pointers
- Verify Network and Infrastructure Pre-requisites
- Gather Entra ID Configuration Parameters
- Set Up Entra ID Application Registration
Network and Infrastructure Prerequisites
To ensure successful integration, the following components must be in place:
- Microsoft Entra ID Tenant: An active Entra ID directory with necessary licenses (e.g., P1 or higher for advanced features like self-service password reset).
- MyPass Gateway Server (Optional for Hybrid): A Windows Server (2016 or later) for on-premises hybrid scenarios involving synced identities.
- Network Connectivity: Secure outbound HTTPS (port 443) from MyPass Cloud to graph.microsoft.com.
- SSL/TLS: All communications use encrypted channels; no additional certificates required beyond standard Microsoft endpoints.
Required System Parameters
The following parameters are required to configure the integration with your Entra ID tenant:
| Requirement | Description |
|---|---|
| Tenant ID | The unique identifier for your Entra ID tenant, e.g., xxxxxxxx-xxxx-xxxx-xxxx-xxxxxxxxxxxx. |
| Application ID | The client ID of the registered app in Entra ID used for API access. |
| Client Secret | The secret value for authenticating the app (use certificate-based auth for production). |
| API Permissions | Granted consents for Microsoft Graph API scopes like User.ReadWrite.All, Directory.ReadWrite.All. |
| Connection Type | OAuth 2.0 with client credentials or delegated permissions. |
Additional Requirements
- Register an application in the Entra ID portal with appropriate API permissions.
- For hybrid environments, ensure Azure AD Connect is configured for identity sync.
- The app registration must have admin consent for directory-wide operations like password resets.
- Test connectivity using tools like Postman to verify Graph API access.
To proceed, provide:
- Group Selection: List of Entra ID security groups for licensing.
- License Allocation: Expected user count in groups.
- Access Policy Requirements: Details on desired policies for groups.
Entra ID Application Registration
The Entra ID app registration is essential for MyPass Cloud's secure interaction with your tenant. This app must have permissions to read user attributes, reset passwords, and query group memberships. It facilitates operations like user ingestion, password management, and audience configuration.
Required Permissions
| Permission Type | Access Level | Purpose |
|---|---|---|
| User.ReadWrite.All | Delegated/Application | Manage user profiles and passwords |
| Directory.ReadWrite.All | Delegated/Application | Query and update directory objects |
| Group.Read.All | Delegated/Application | Read group memberships for targeting |
Granting Permissions
To set up the app registration in the Microsoft Entra admin center:
- Navigate to Entra ID > App registrations > New registration.
- Enter a name (e.g., MyPassConnector), select supported account types, and register.
- Under API permissions, add Microsoft Graph permissions as listed above.
- Grant admin consent for the permissions.
- Create a client secret or certificate under Certificates & secrets.
Supported Attributes
MyPass can read and, in some cases, write to the following Entra ID user attributes:
Attribute Operation Description Required postalCode Read Postal Code No state Read State No preferredLanguage Read Preferred Language – Not used currently No officeLocation Read Office Location No companyName Read Company Name No manager Read Manager Yes phone Read Phone Yes mobilePhone Read Mobile Phone Yes Read E-mail address Yes otherMails Read Other Email addresses Yes usageLocation Read Required for users that will be assigned licenses due to legal requirement No userType Read User Type No memberOf Read The Groups a user is member of Yes lastPasswordChangeDateTime Read Used to determine whether a user has been locked because of too many failed login attempts Yes createdDateTime Read Date of account creation No employeeHireDate Read Hire date No employeeId Read Employee ID No employeeOrgData Read Division and Cost center No employeeType Read Employee type No identities Read Represents the identities that can be used to sign in to this user account No imAddresses Read Instant messaging (IM) address for a contact No passwordPolicies Read Overall Password Policy data No passwordProfile Read Contains the password profile associated with a user No Besides the data noted above, MyPass can write the password when resetting the password for the user.
End-User Experience in Different Entra ID Scenarios
Entra ID evolves continuously, and MyPass updates accordingly. SSPR via MyPass works as expected in common scenarios. For the best experience, use a federated solution where the on-premises login screen can link to MyPass SSPR.
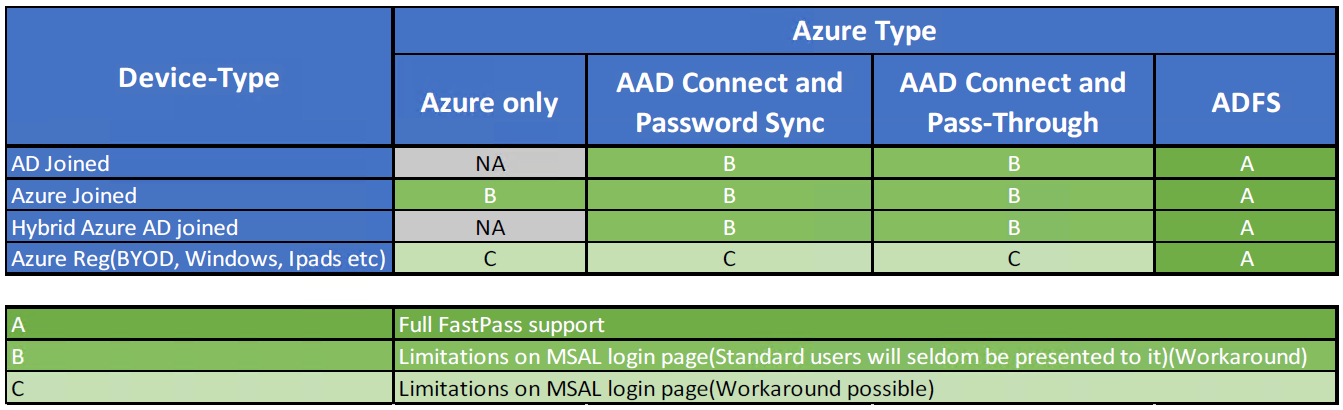
Users activating MyPass from Windows Login get a seamless experience. Issues arise with the MSAL login window (common for Category C users, rare for Category B). Microsoft displays a link to its own SSPR, even if unlicensed, disabled, or inaccessible.

The link is shown for all users Even if:
- The Organisation have not Licensed it
- The Organisation has disabled it
- The user has no access to it
Unfortunately, this link cannot be removed. We suggest to add some helpful text to guide users in this case.
Creating an Entra ID Application for MyPass
Follow these steps to create the application token MyPass needs to manage Entra ID users.
Pre-requisites: Administrative account with rights to create Enterprise applications in Entra ID.
Steps to create an Entra ID Enterprise Application
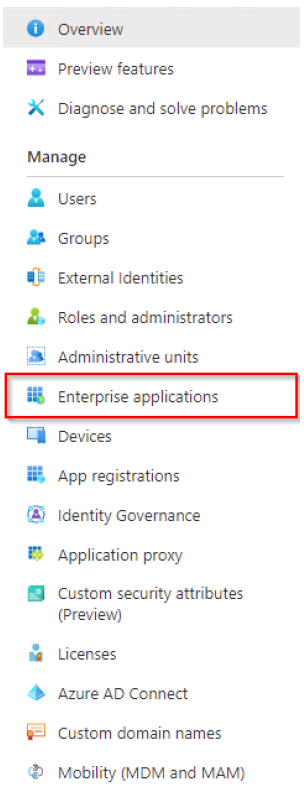
Log in to the Entra ID Portal for the target tenant.
On the right-hand side, click Enterprise applications and follow the instructions below.
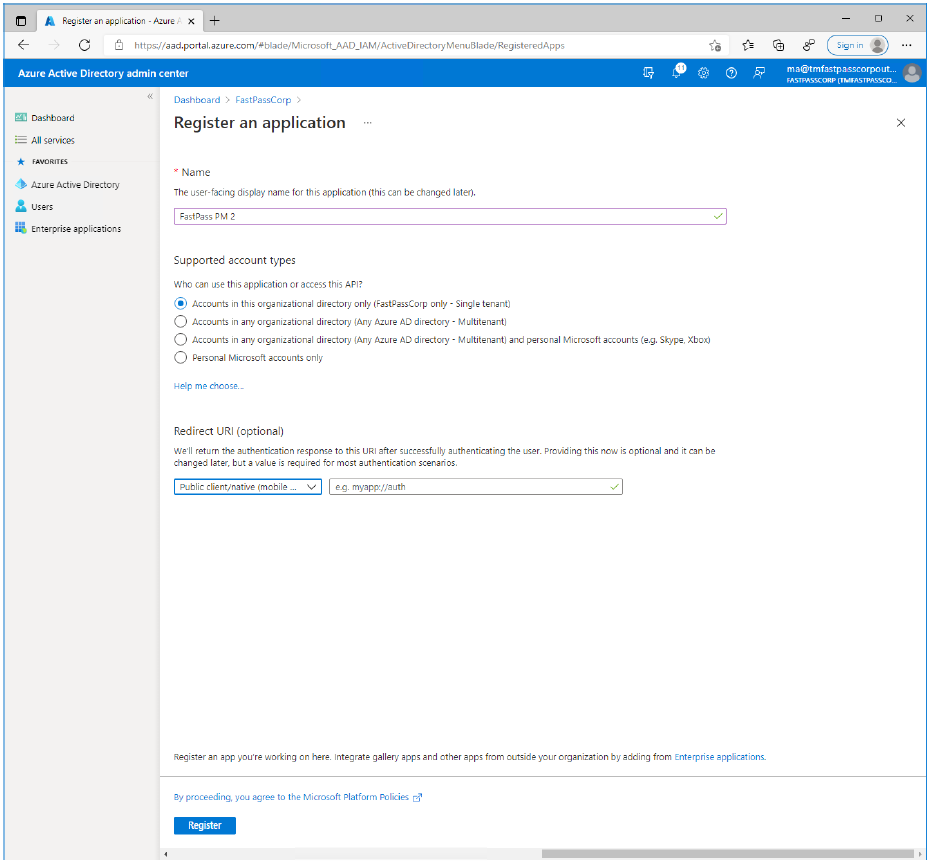
Enter a descriptive name, like "FastPass PM" and make selections as shown. Then click Register.
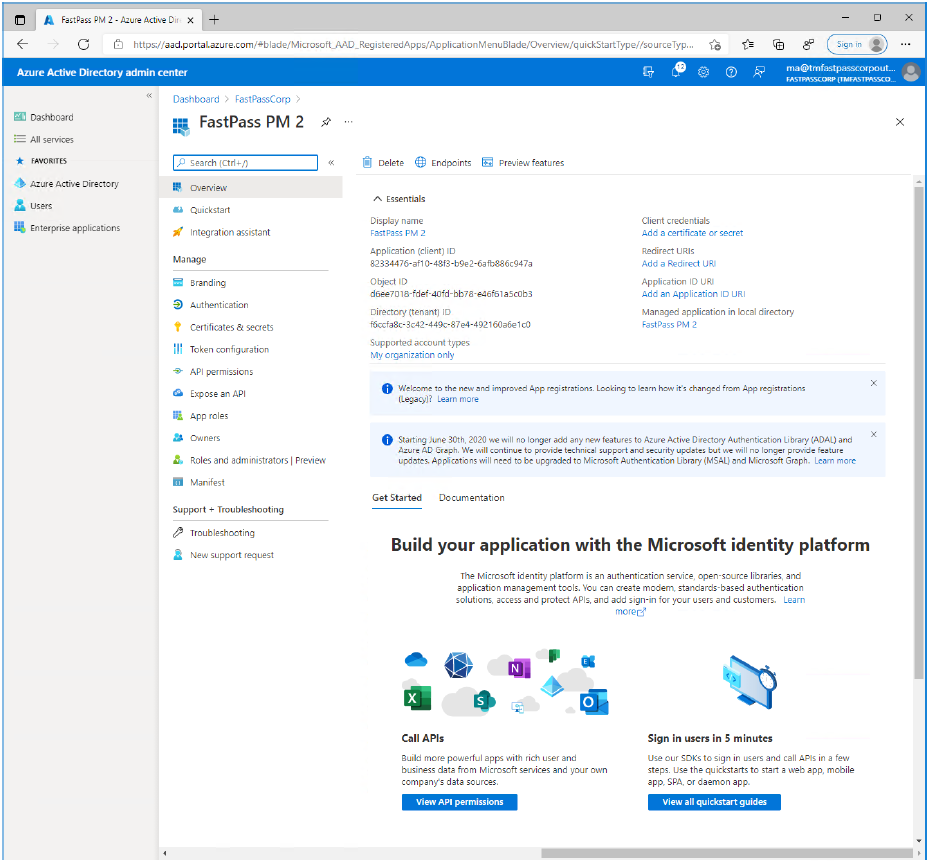
You will now see the landing page of your Enterprise Application.
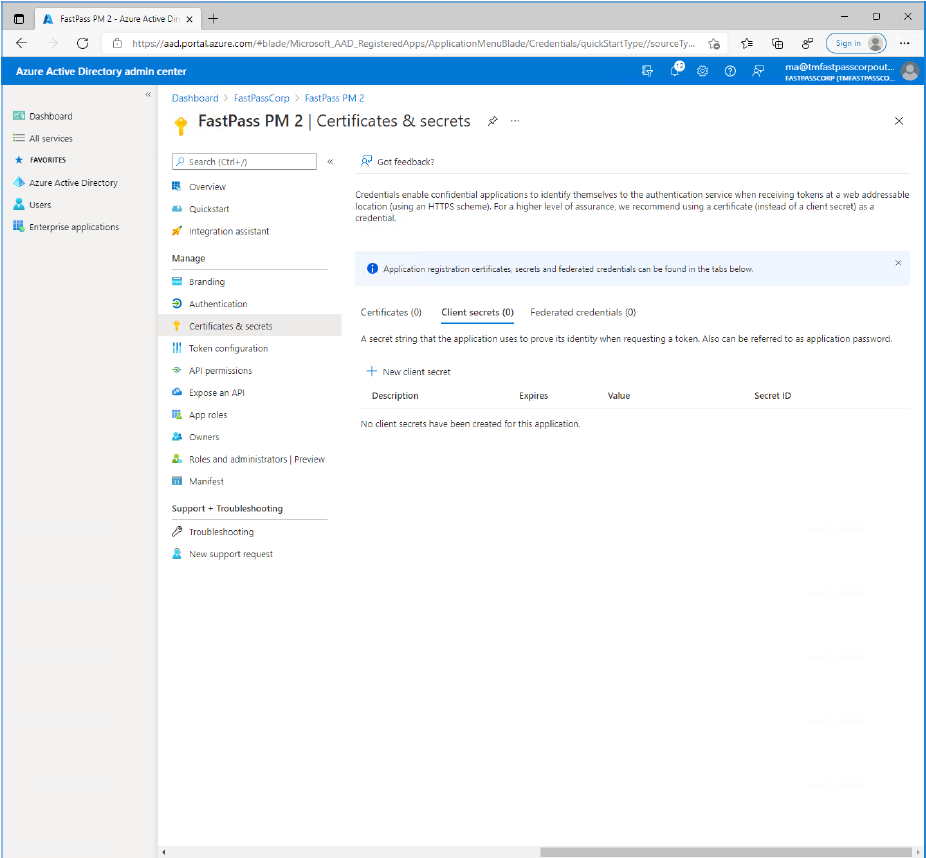
Now, in the upper right corner, under "Client Credentials", click "Add a certificate or secret".
- Copy the value of "Directory (tenant) ID" and paste the copied value into a safe storage.
- Copy the value of "Application (client) ID" and paste the copied value into a safe storage.
With the "Client Secrets" tab selected, click "New client secret".
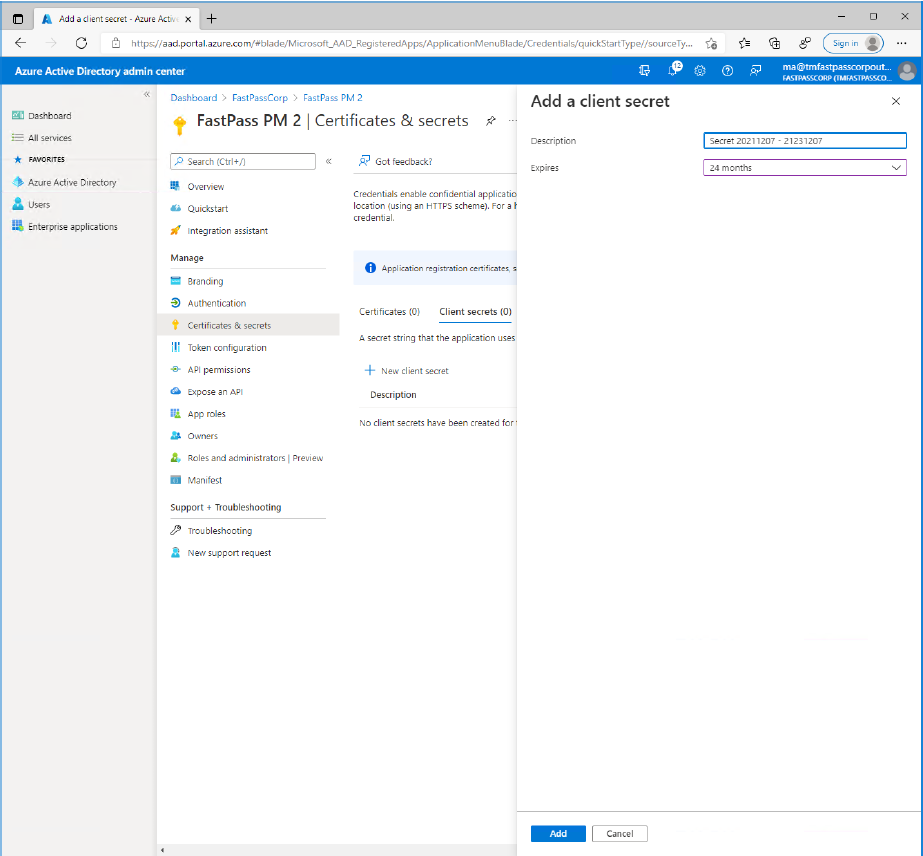
Enter a descriptive name for the secret and select a expiration period that matches business policies. Click the "Add" button.
Click the "Copy to clipboard" icon next to the value of the secret (not the secret id). Paste the copied value into a safe storage.
- Note: The value cannot be copied at a later time but you can always create a new secret.
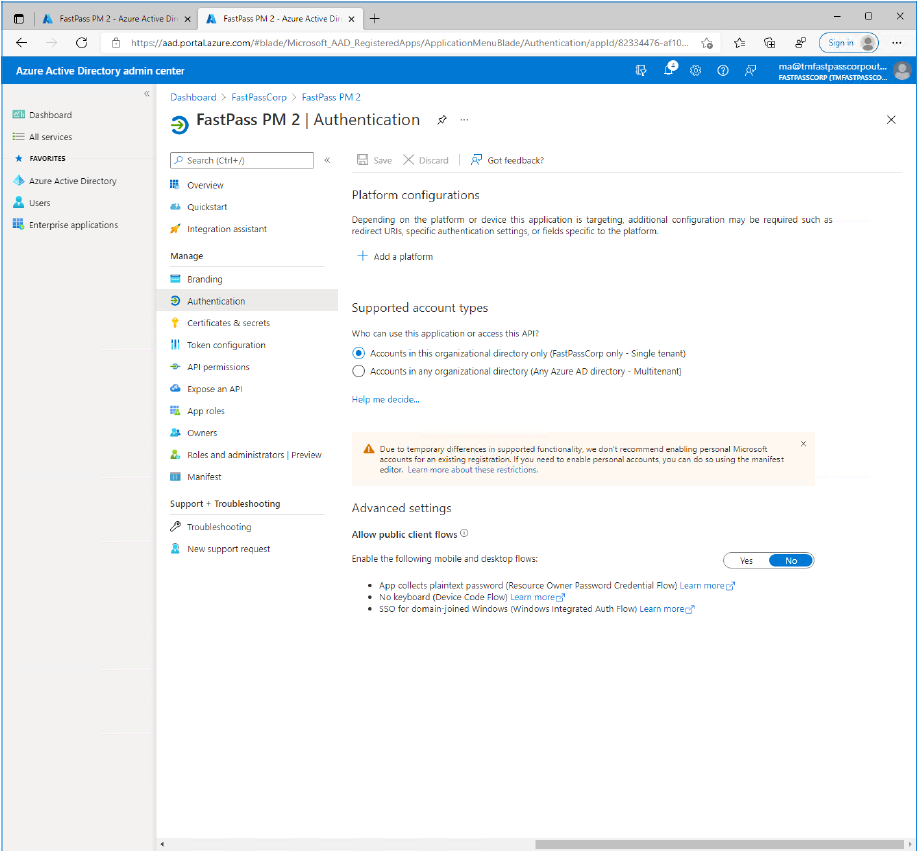
- Now, in the app-menupanel click the "Authentication" item.
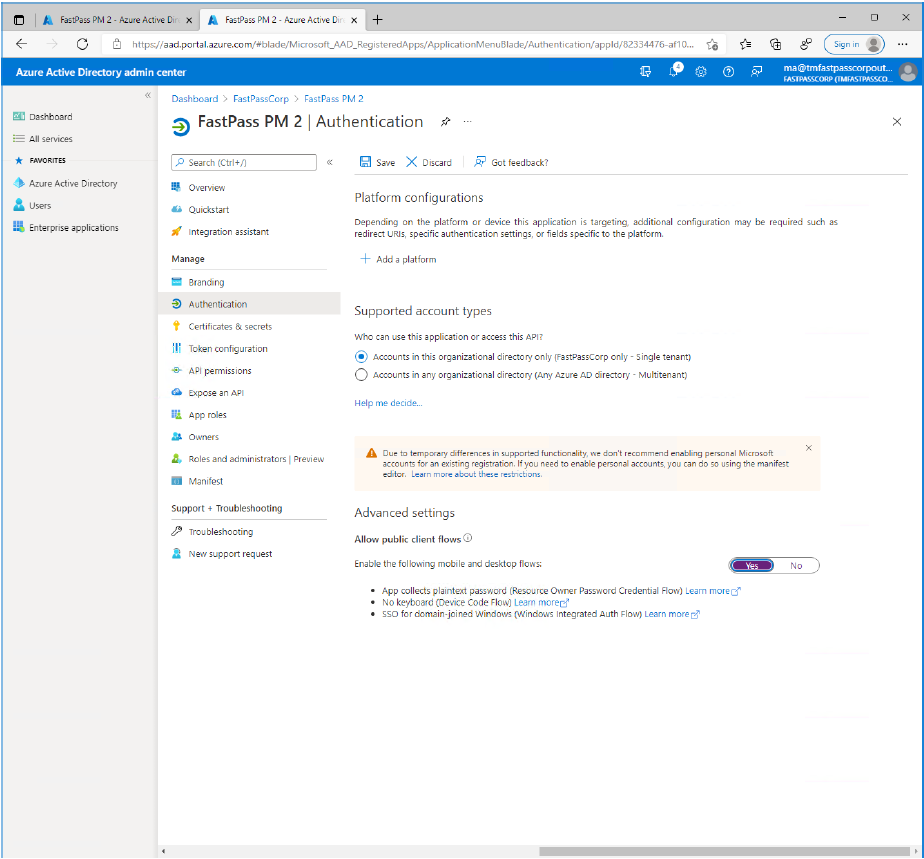
- Under "Advanced Settings", click the "Yes" switch button to allow public client flows.
- Click the "Save" button located at the top of the screen.
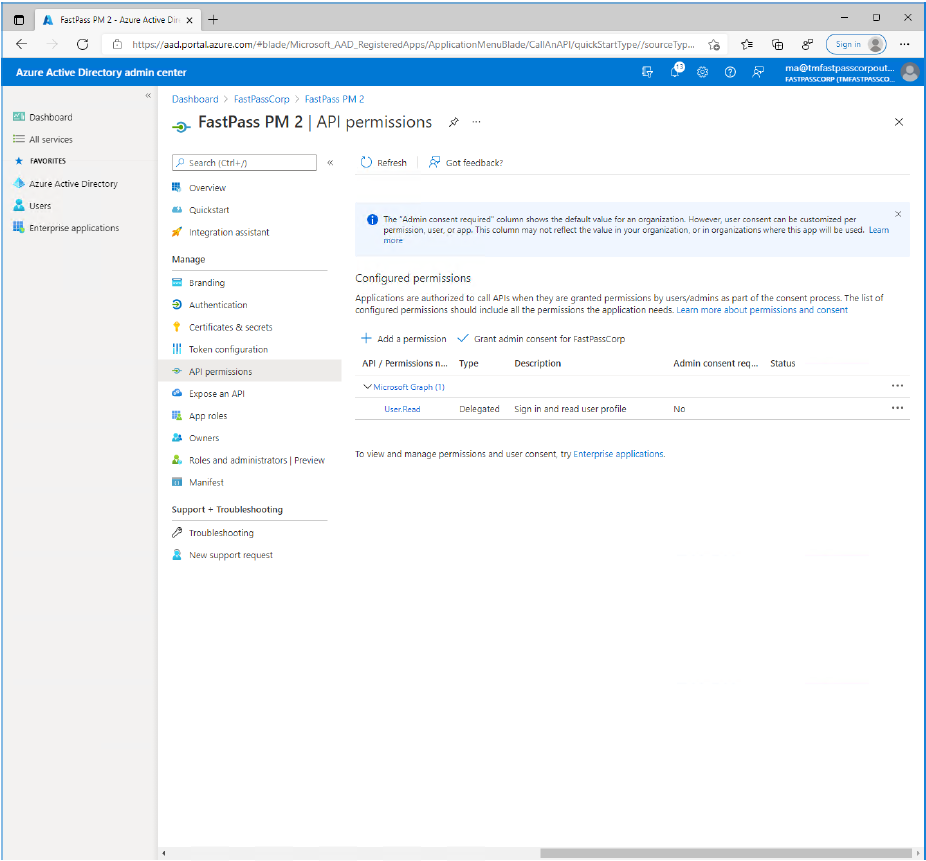
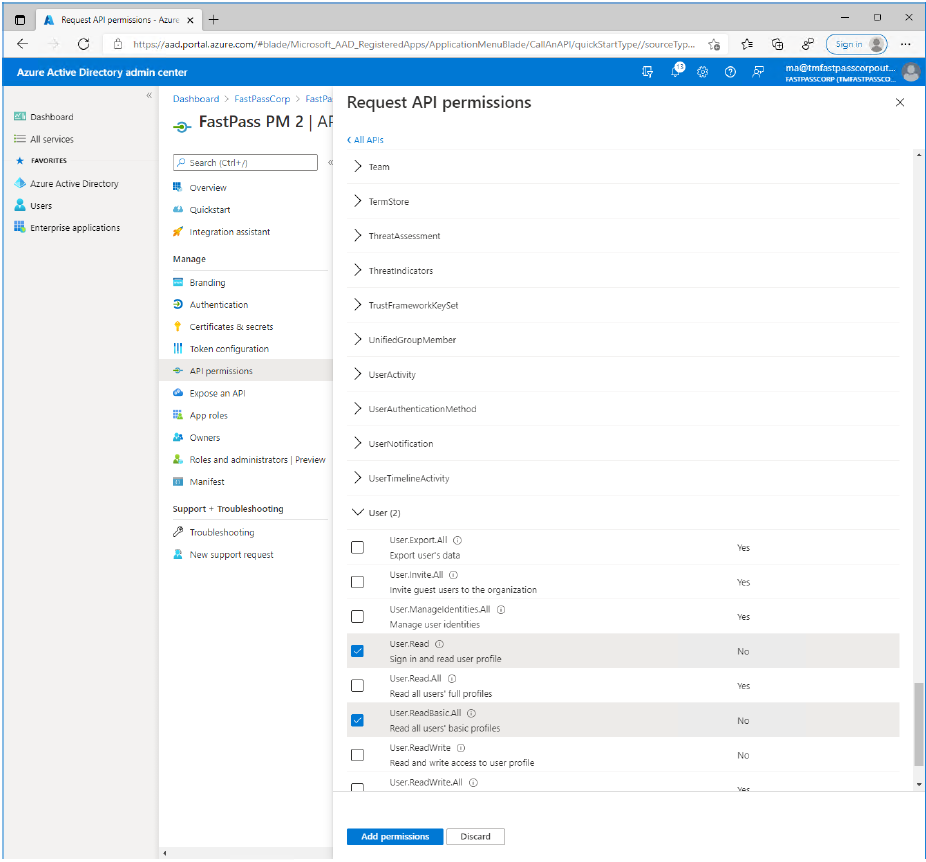
- Now, in the app-menupanel click the "API permissions" item. Then click "Add a permission"
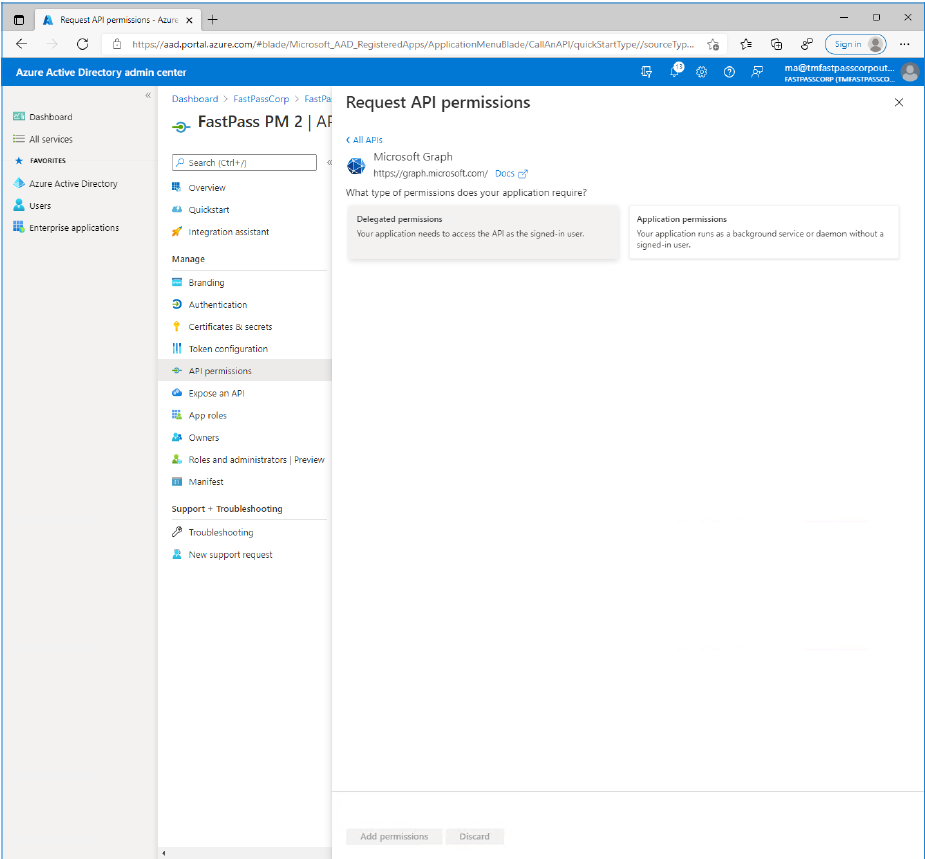
- Click the large "Microsoft Graph" option.
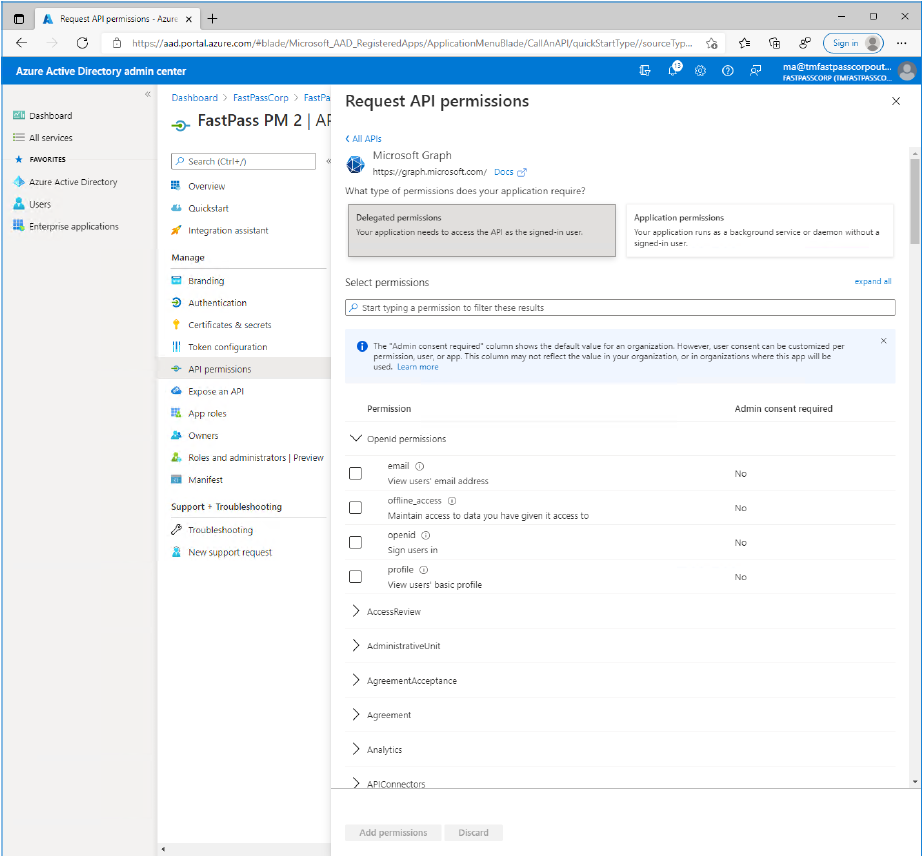
- Click the "Delegated permissions" item.
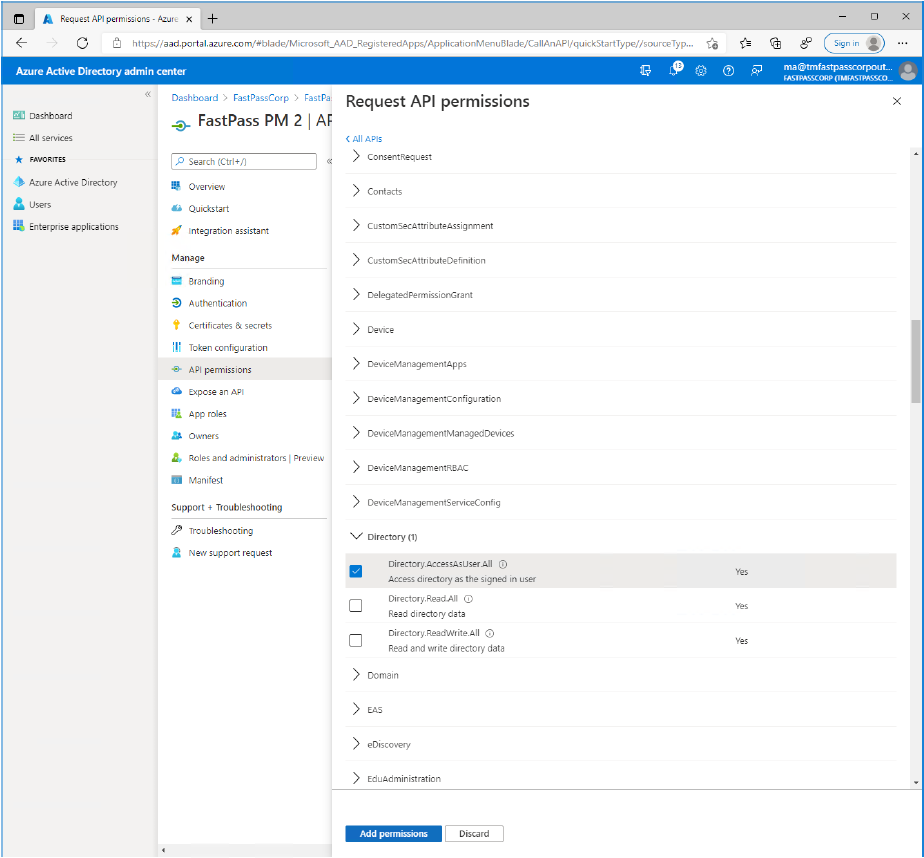
- Scroll down and expand the "Directory" item and select the "Directory.AccessAsUser.All" permission item.
- Now, scroll down and expand the "User" item and select the "User.ReadBasic.All" permission item.
- Click the "Add permissions" button.
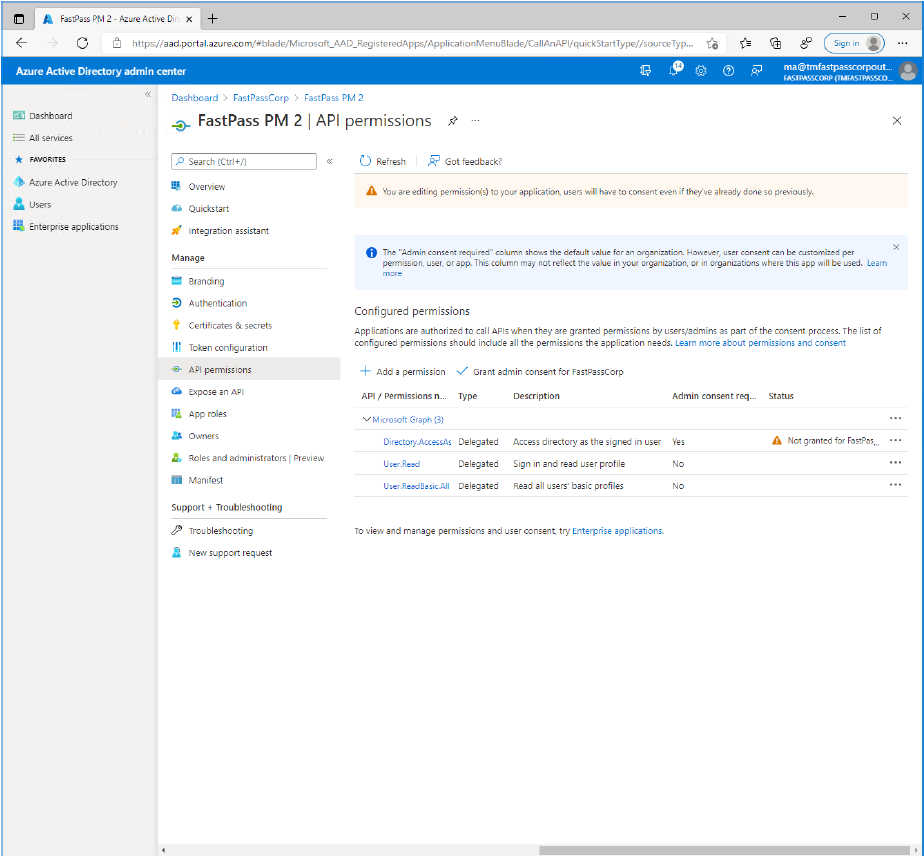
- Now, notice the orange warning symbol. This tells that an administrator needs to grant consent on behalf of the users.
- Click on the "Grant admin consent for
TenantNamebutton.- Notice that this is only possible if you are a tenant administrator.
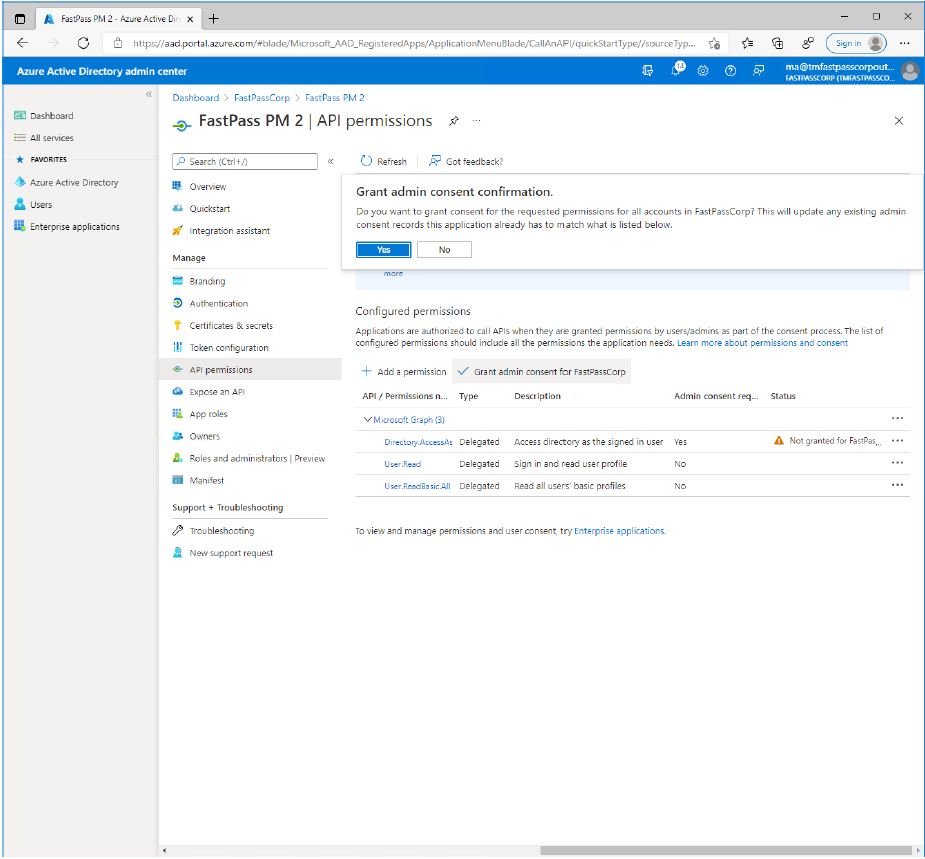
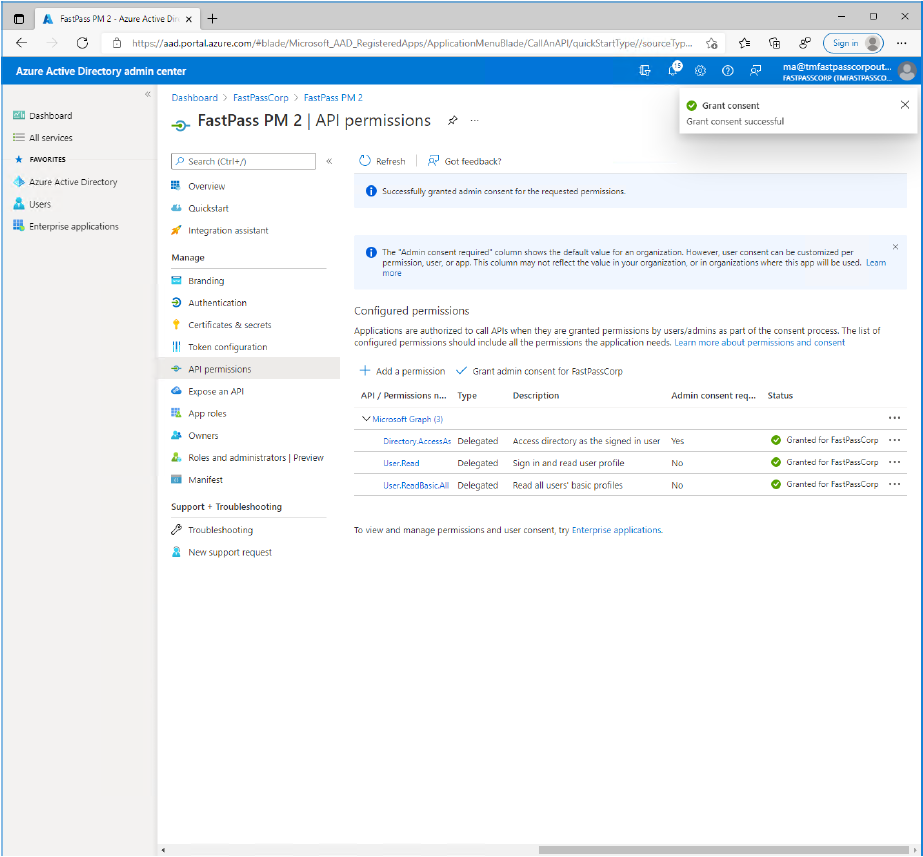
- Click the "Yes" button to confirm.
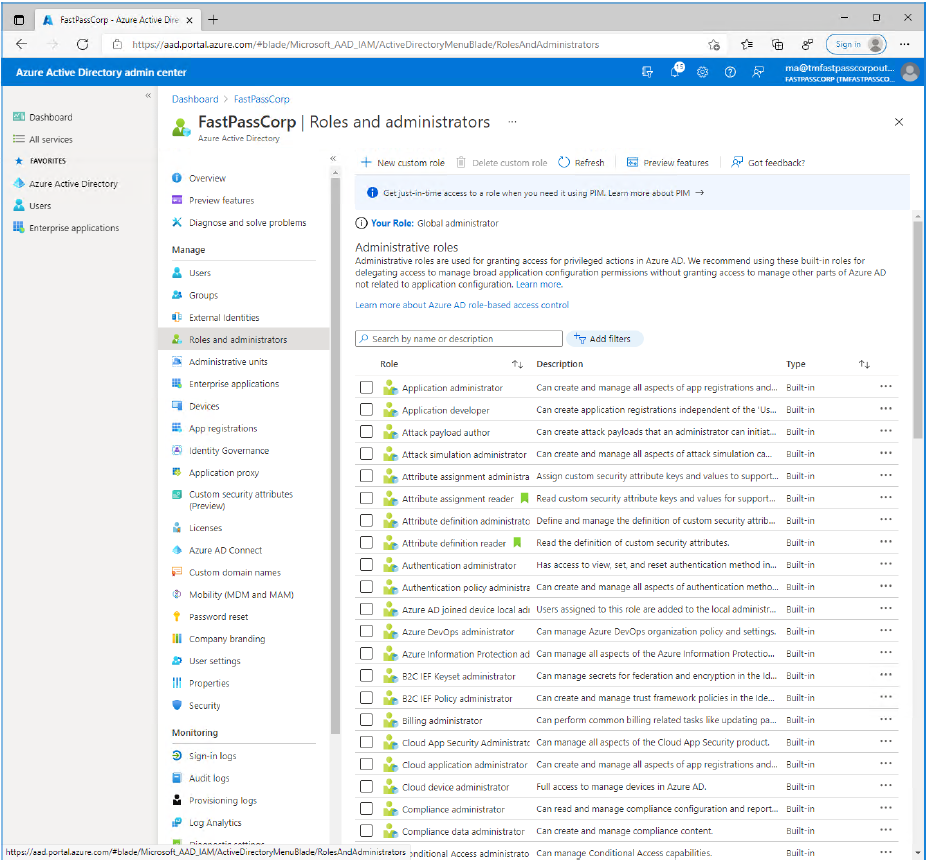
- Now in the main menupanel click "Azure Active Directory"
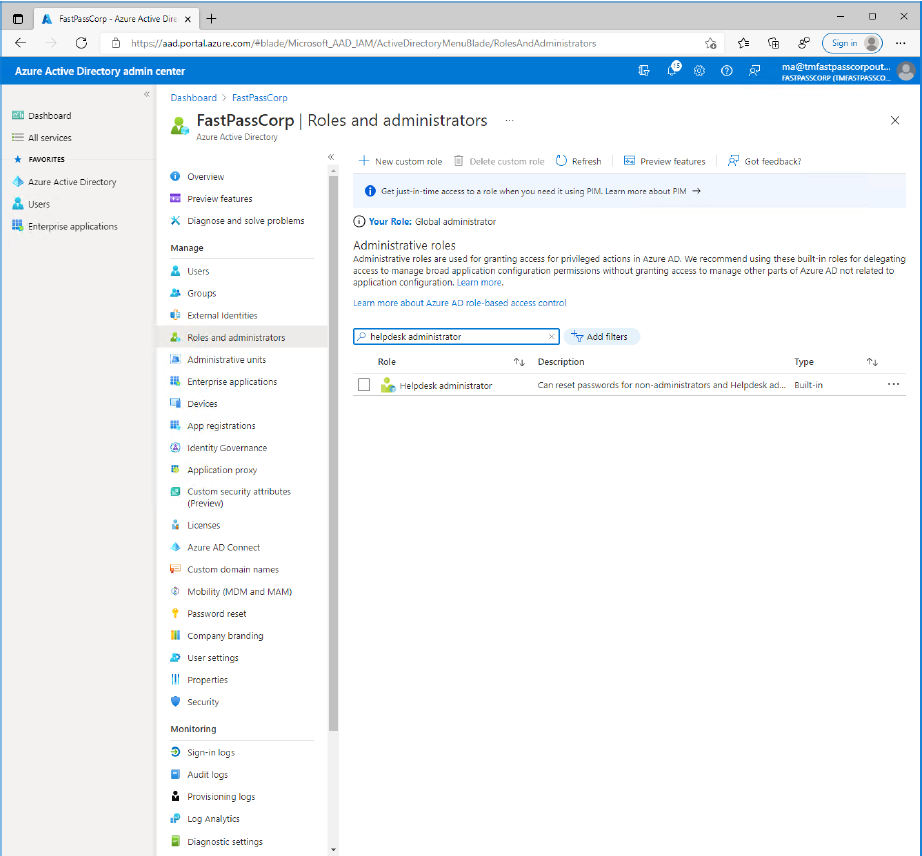
- Enter either "Helpdesk administrators" or "Password administrators" in the search field.
- Click the shown item.
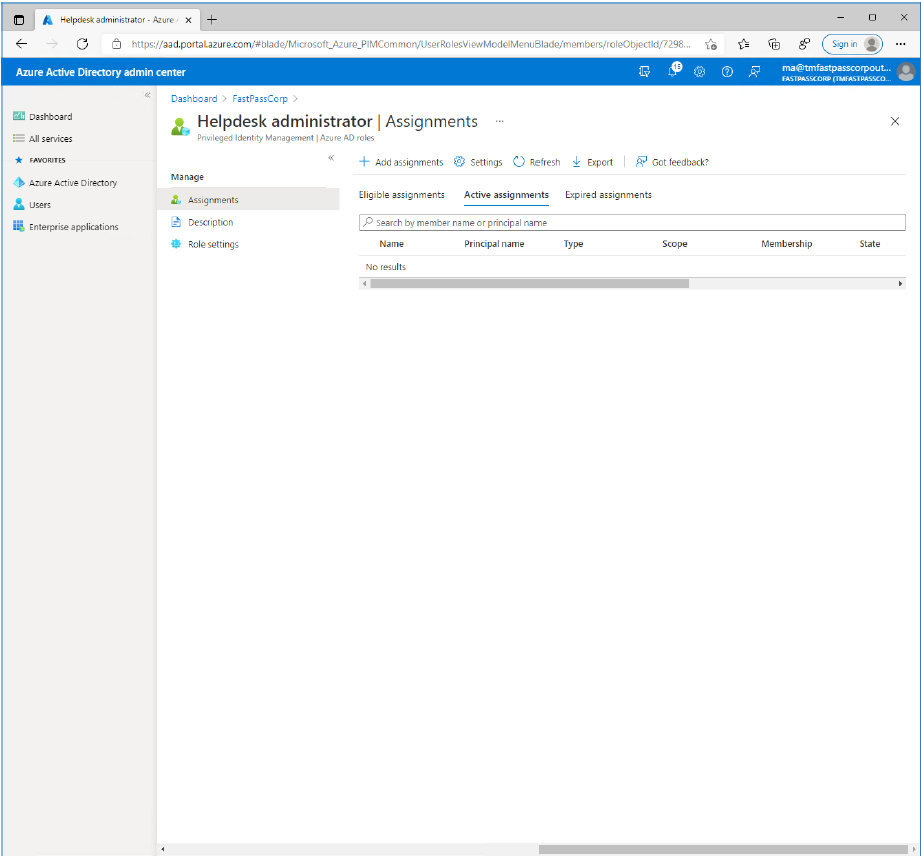
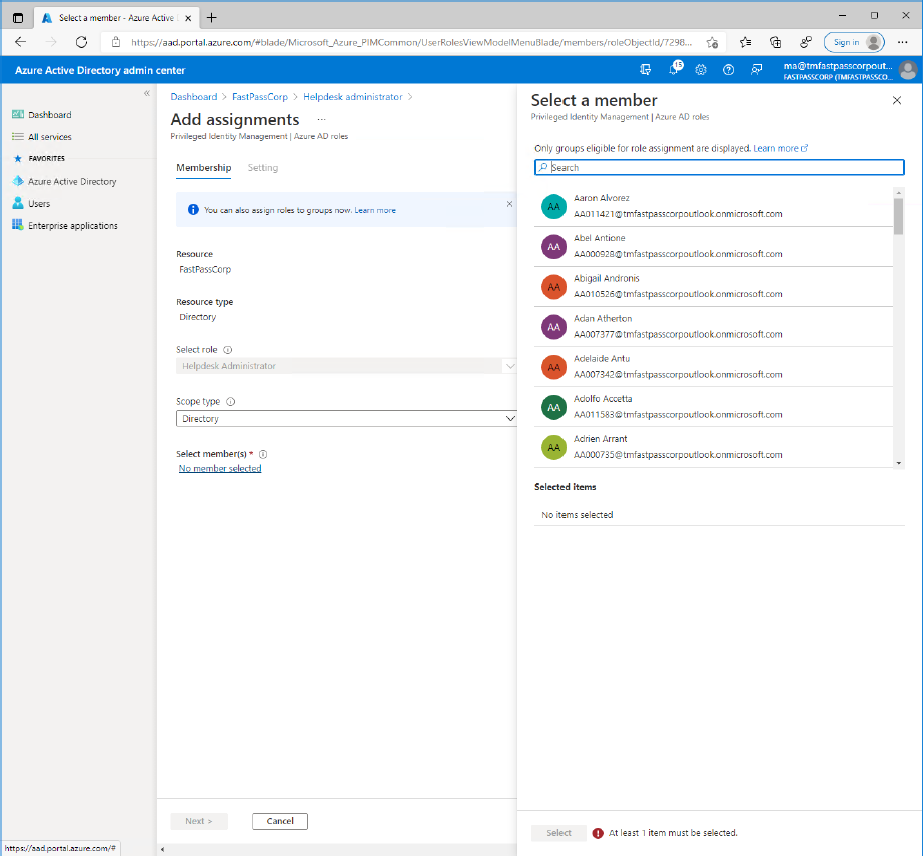
- Click the "Add assignment" button at the top of the screen.
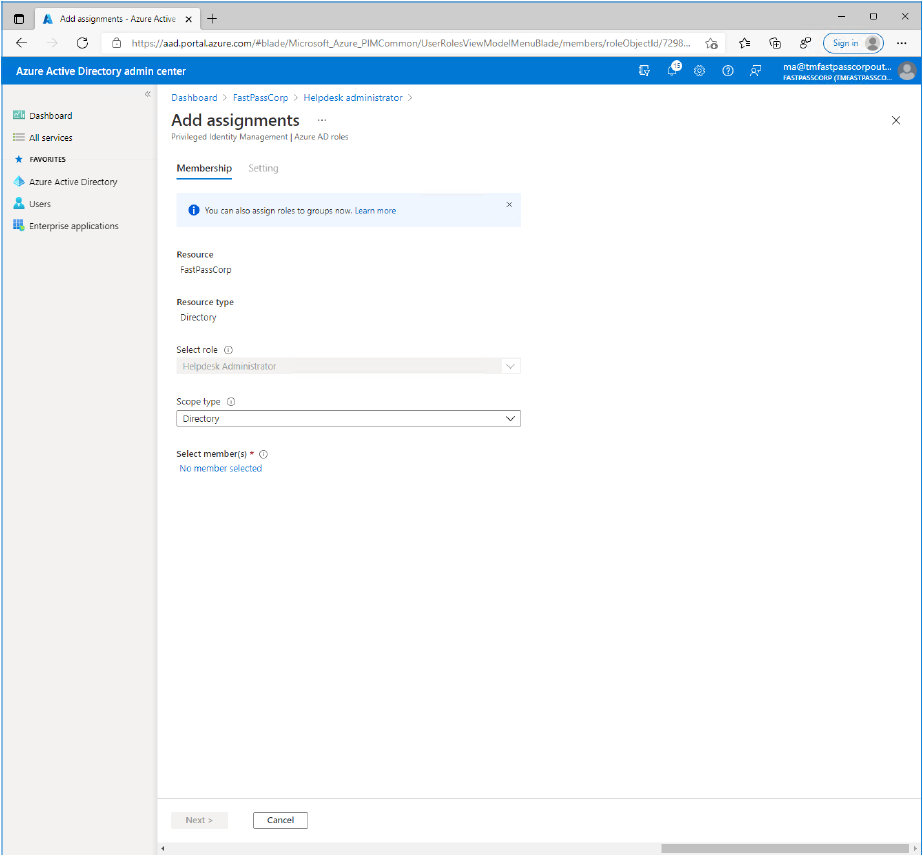
- Click the "No member selected" link button.
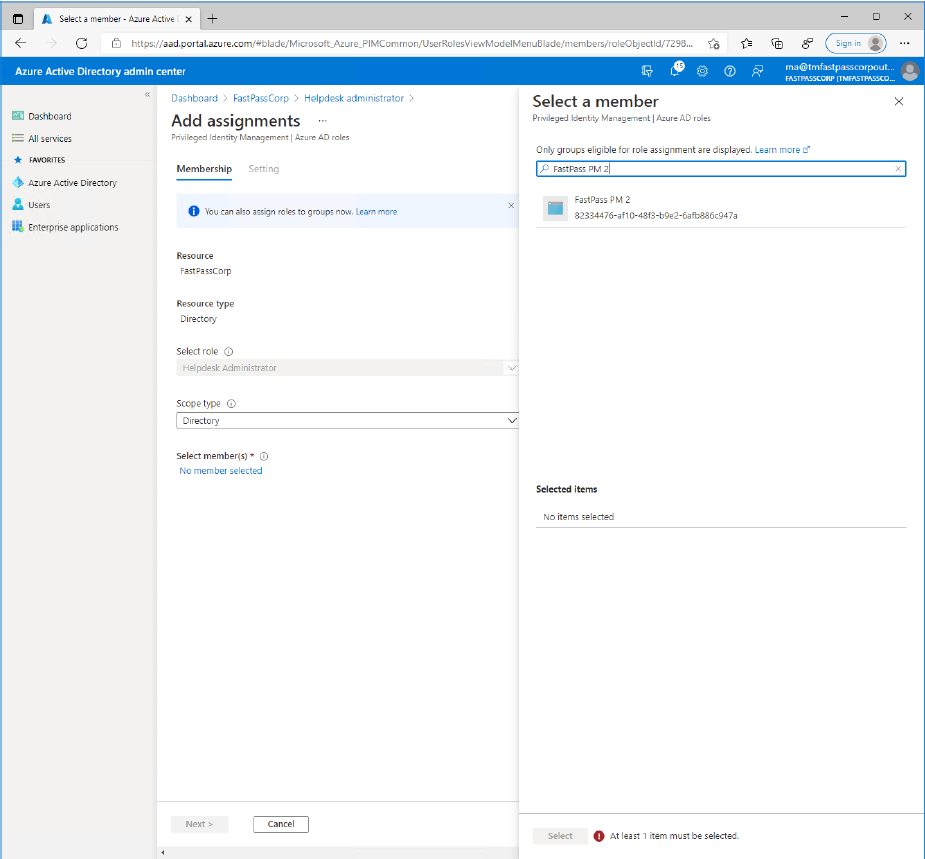
- Enter the application name into the search field (as specified when registering the "App").
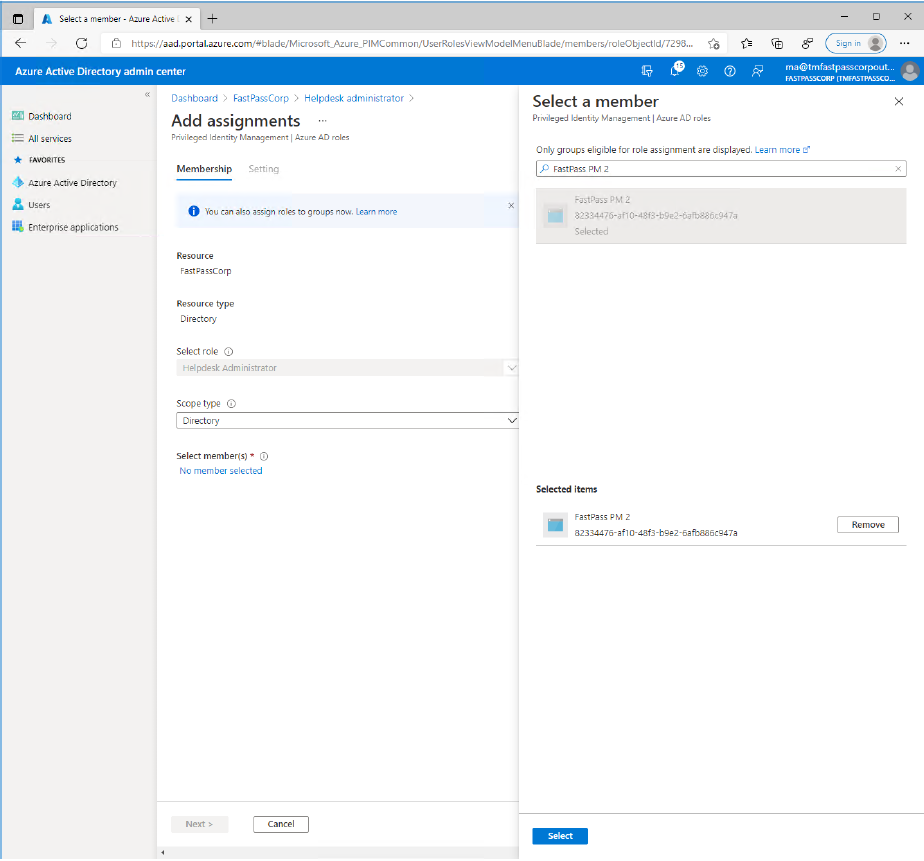
- Select the shown item.
- Click the "Select" button.
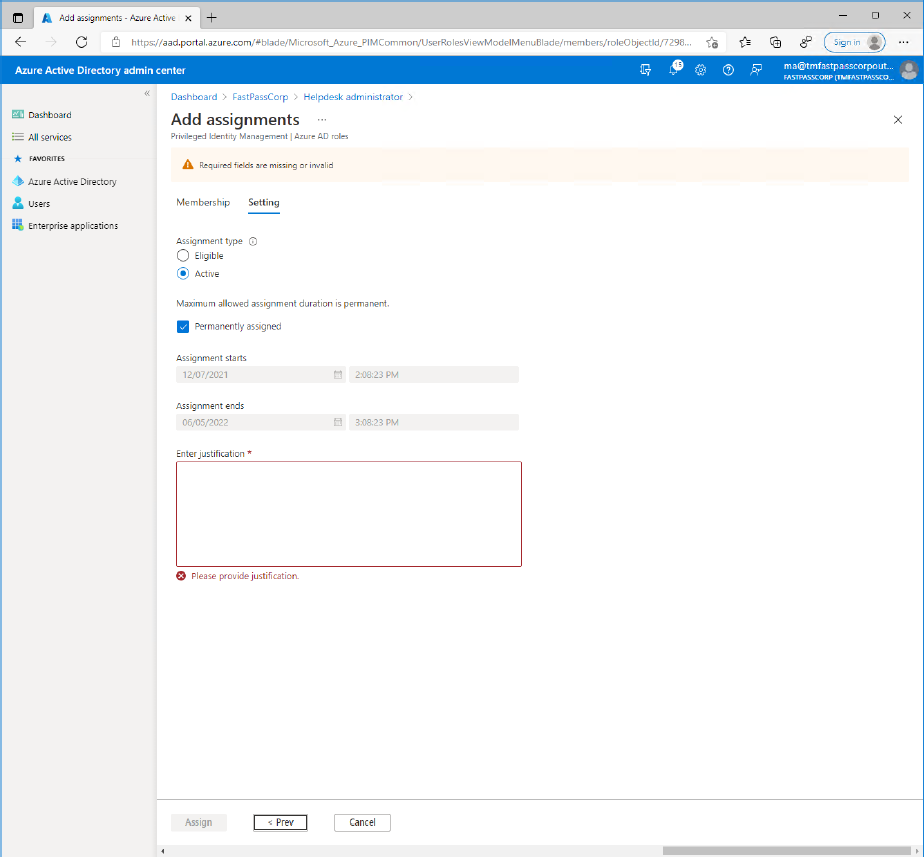
- Click the "Next >" button.
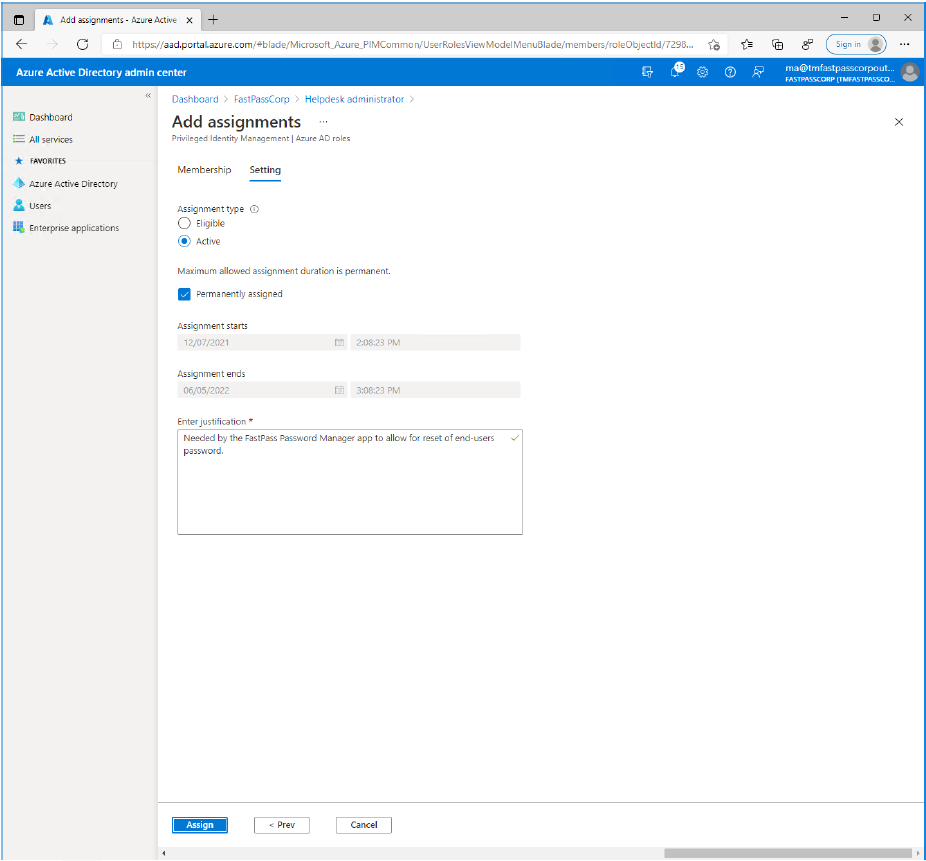
- Enter a text explaining what the permission is needed for into the field.(This may not be a neccessary step as it depends on other settings in tenant)
- Click the "Assign" button.
- Notice that the assignment wont be shown immidiately. It may take a few minutes.
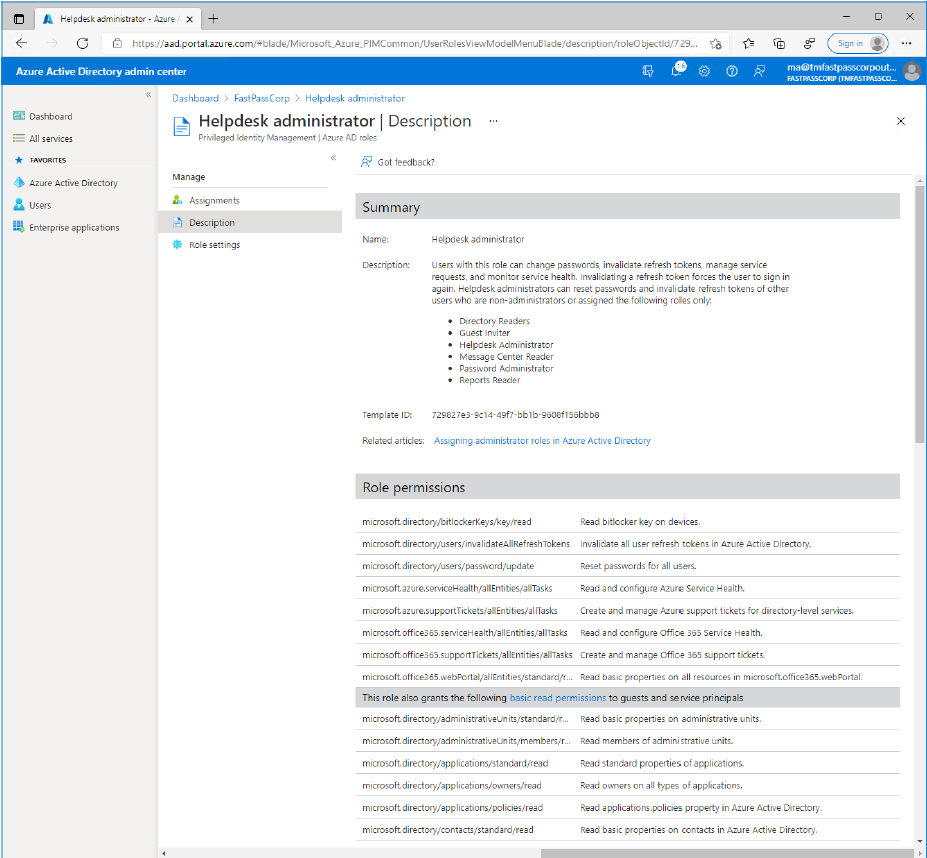
- Click the "Description" menu item to review the permissions that is given with the role assignment
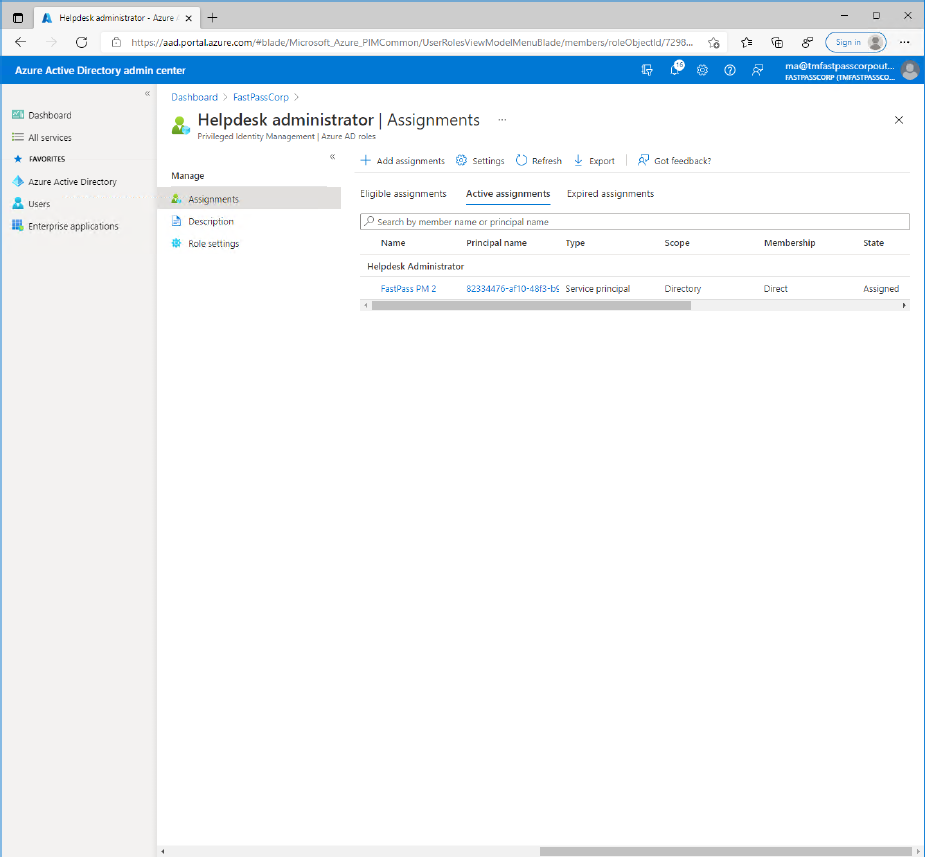
- Click the "Assignments" menu item to verify that the role assignment is being completed.
- Now, everything should be ready...


For sales inquiries or technical scoping, contact your MyPass representative to validate Entra ID tenant compatibility and API permissions during proof-of-concept.